How it Works
RadioEye is an AI-enabled image retrieval reference tool with a large proprietary database of histologically and clinically validated pathologies with corresponding MR image sequences. Several cases are stored for most pathologies, even rare ones, so that radiologists can understand the different presentations of a disease. The pathologies displayed in RadioEye are based on gold-standard diagnostic techniques and are histologically validated. RadioEye is integrated into a hospital’s PACS and uses machine learning to analyze an image, sorting its own reference database according to image similarity so that the user can find relevant cases as quickly as possible.

PACS Integration and Image Search
Image search functionality can be used from the hospital’s PACS. Simply scroll through a case to a slice where the pathology can be seen as clearly as possible. An orange frame appears around the image that was last manipulated. The frame indicates that the image is currently selected. Clicking on the RadioEye button at the top right will send the selected image to the RadioEye tool.* The application will then display the results of the image search.
* Note: visualization may vary by PACS provider.


Navigating the Database
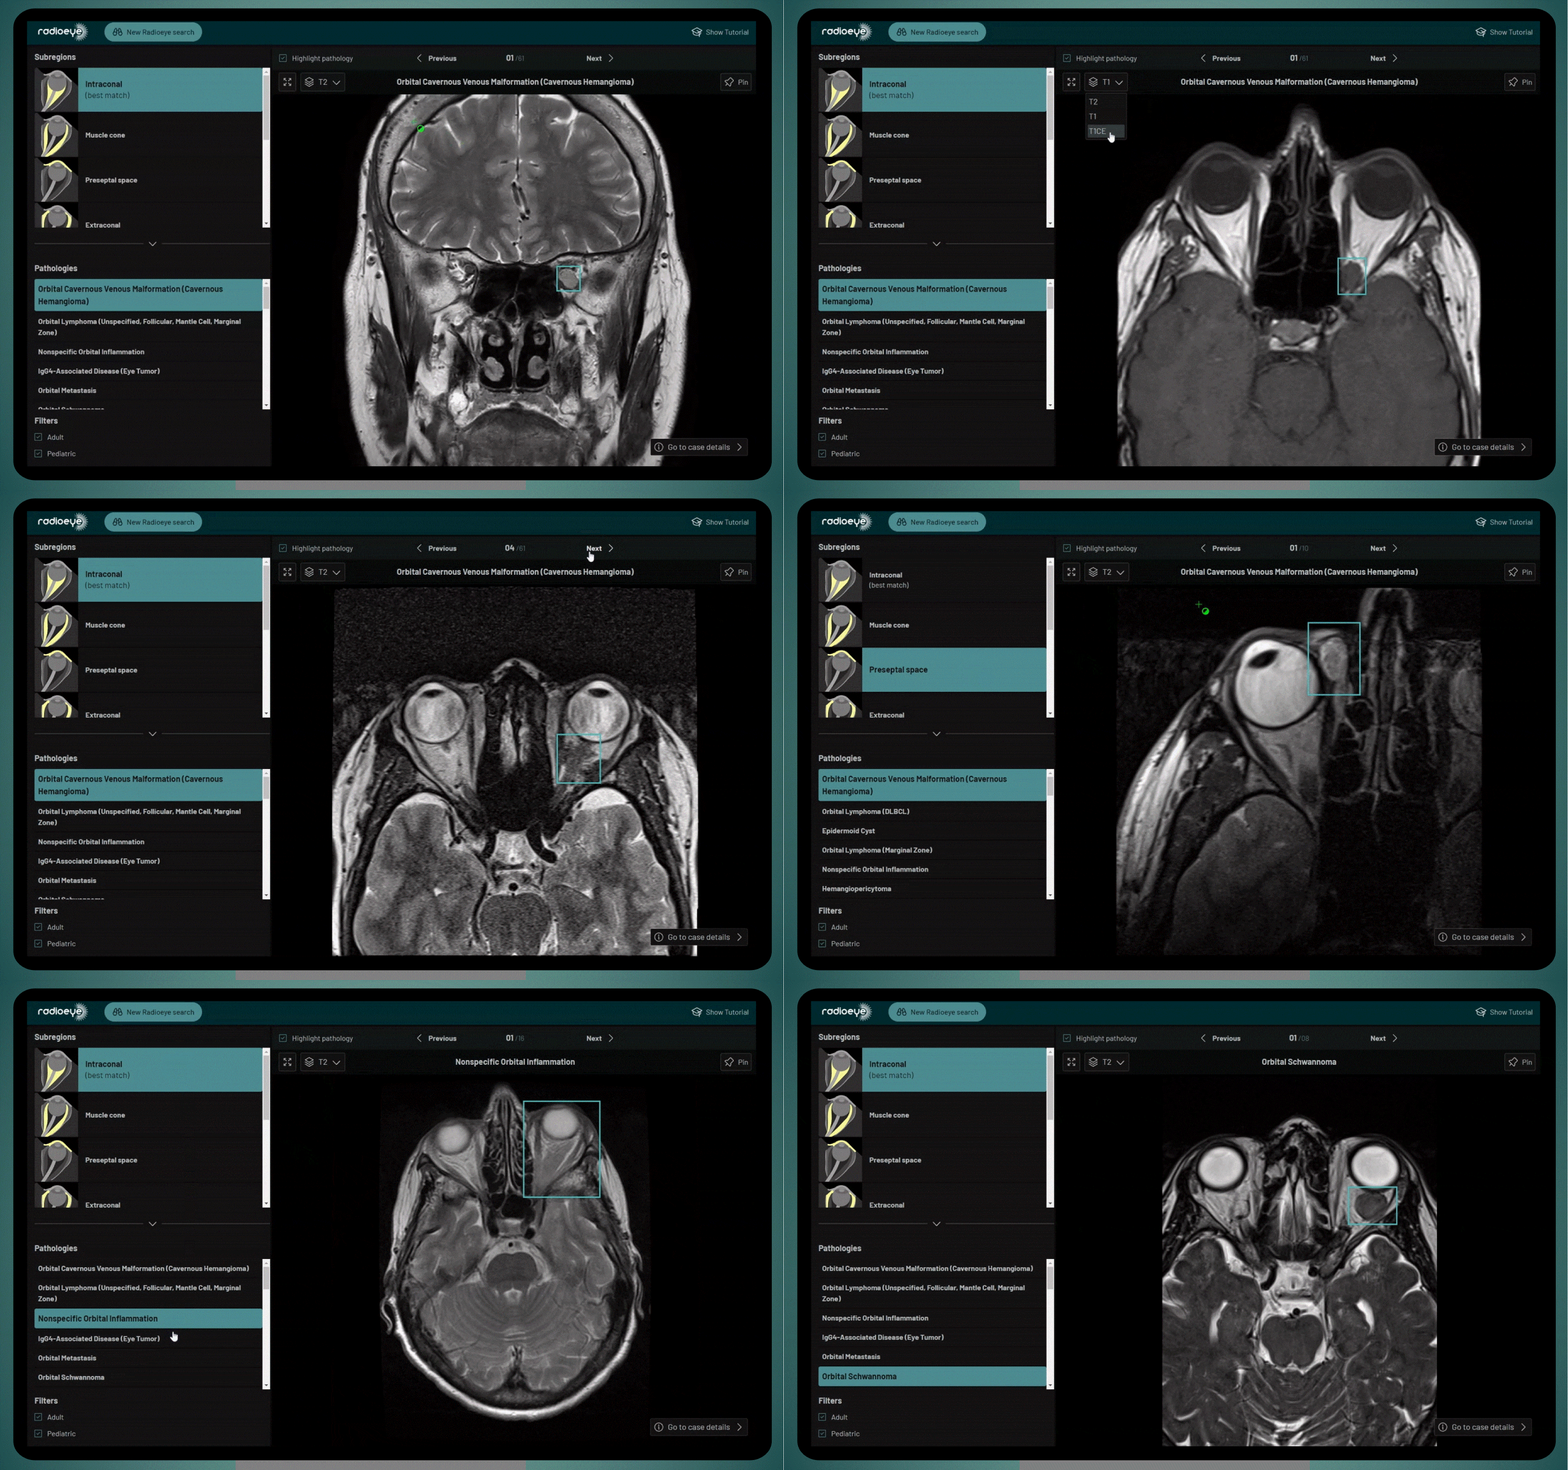
Explore Image Search Results. The database is organized so that a user can select the anatomical subregion of the pathology on the left (Intraconal, Muscle Cone, etc.) and pathologies within the subregions below. Depending on the selection, corresponding radiological cases are then immediately displayed.
RadioEye - A Quick Guide:
View Other Sequences:
Use a drop-down menu at the top left of the image to select the sequence displayed (T1, T2, T1CE, ADC, T1FS, etc.)
View Other Cases with the Same Pathology:
Above the image there are the “Previous” and “Next” buttons to view other cases.
View Other Pathologies Within the Same Subregion:
Browse pathologies of the selected anatomical subregion in list view at the bottom left.
Select Other Pathology Subregions:
View and select other subregions at the top left.
Filter Cases by Age:
Toggle display results between pediatric and/or adult cases at the bottom left.
Highlight Pathology Box:
Click on the “Highlight pathology” toggle above the image to remove the turquoise bounding box.
Image Manipulation
Images in the database can be manipulated in the same way as in PACS.
Options
Scrolling through the volume:
Move the mouse wheel on the image to display other slices in the z dimension
Zoom:
Ctrl + click when dragging the cursor down to zoom in.
Ctrl + click and drag up to zoom out.
Moving the Image Section:
Shift + click to change the image section.
Scale Intensity:
Change the pixel intensity or brightness by clicking on the image and dragging up (brighter) or down (darker).
Intensity Windowing:
Enlarge the pixel intensity window by clicking and dragging to the left.
Reduce the pixel intensity window by dragging to the right.


Organize Cases into Lists
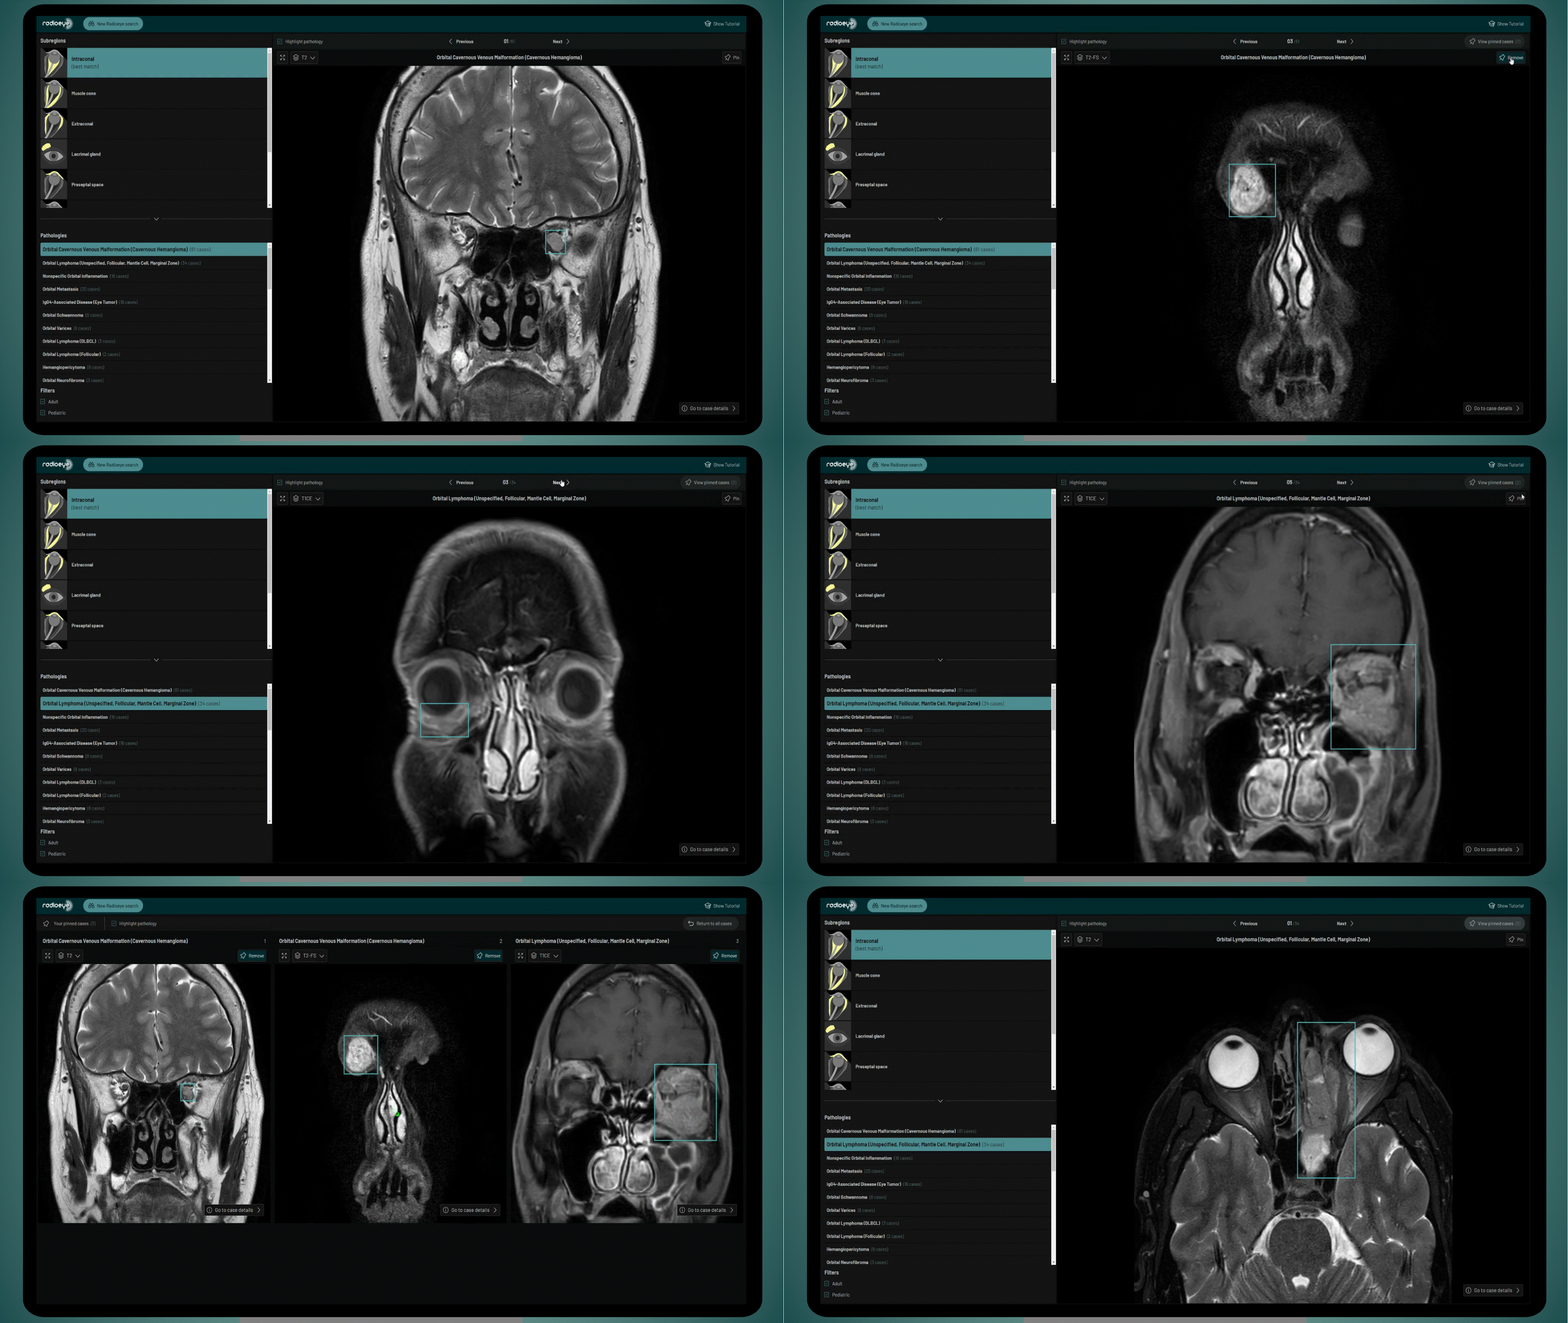
Pin individual cases and view a list of pinned cases. Cases are displayed next to each other so that a direct comparison of the different cases is possible. To pin cases, click on the “Pin” button at the top right above the image. To view the list of pinned cases, click on the "View pinned cases" button at the top right.
